
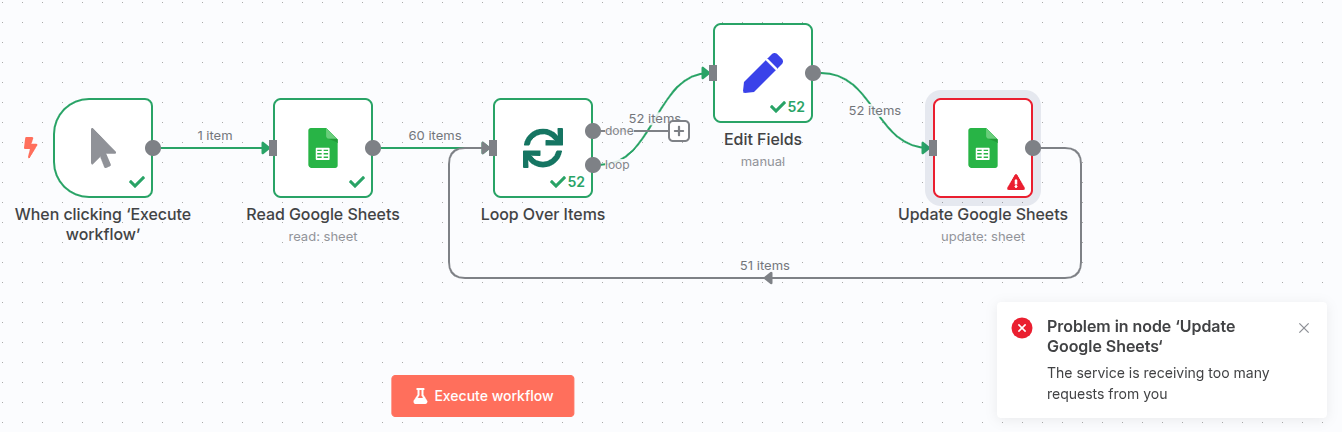
When building an n8n workflow, it’s a common and effective practice to use a Google Sheet as a user interface or a database. This approach works perfectly for small batches of data. But what happens when your data volume scales up, and your workflow starts failing with a cryptic error message like “The service is receiving too many requests from you”? This error is your friendly reminder that you’ve hit the Google Sheets API’s rate limit.
Let’s break down what’s happening and how to fix it with a simple, yet powerful, strategy.
The Problem: When a Simple Workflow Fails
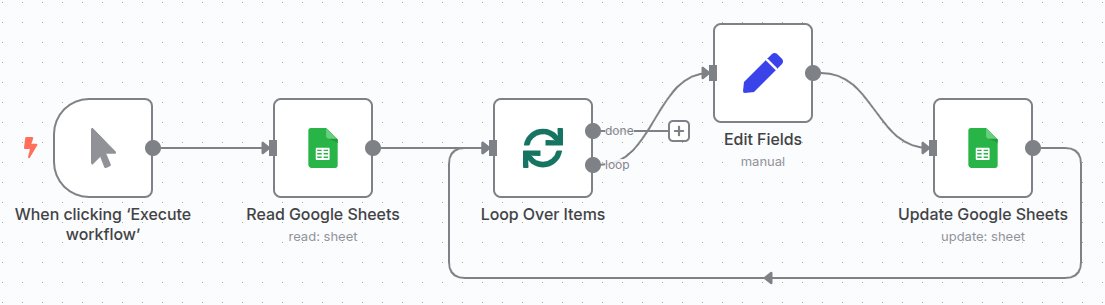
Imagine a simple n8n workflow designed to process a large number of items and update a Google Sheet. You’ve likely configured it to do something like this:
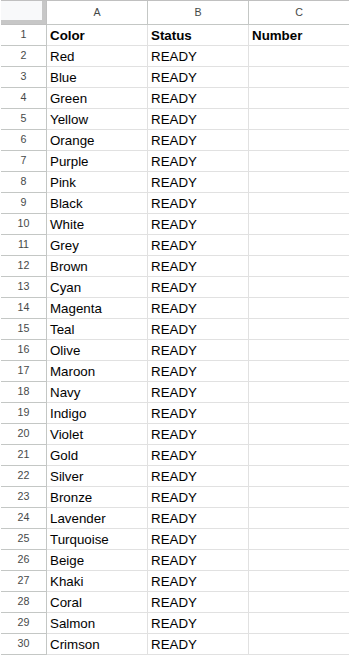
- Read Data: A node (like a Google Sheets node or an external data source) reads a large list of items.
- Process Data: A series of nodes performs some logic on each item.
- Update Google Sheet: A final Google Sheets node is placed inside a loop to update each row of your spreadsheet individually.
The problem is that even when a Google Sheets node is configured to update one row at a time within a loop, n8n can process data incredibly fast. This can cause the workflow to send a barrage of requests to the Google Sheets API in rapid succession, exceeding the number of requests the API allows per minute. The API, in turn, blocks further requests from your account, causing your workflow to fail.
The Solution: The Wait Node and Retry/Delay
The best way to handle this is to implement a retry/delay strategy. This approach tells your workflow to “take a break” whenever it encounters a rate limit error, giving the Google Sheets API time to reset before trying again. The key to this strategy is the Wait node.
Here’s how you can modify your failing workflow to make it resilient to rate limits. The core idea is to route any failed requests to a Wait node, which then holds the execution for a set period before retrying.
Step 1: Identify the Nodes That Might Fail
The most likely culprit for this error is the Google Sheets node itself. In a typical workflow, this is the node responsible for writing data. You will have a Google Sheets node configured to “Update a Row” for each item in your data set.
Step 2: Add a Wait Node
Drag a Wait node from the node panel onto your canvas. This node is a simple but powerful tool for controlling the flow of your workflow.
Step 3: Connect the Error Output
The crucial step is to connect the error output of your Google Sheets node to the input of the Wait node. When the Google Sheets node fails due to a rate limit, the data will be routed along this red error path instead of the regular success path.
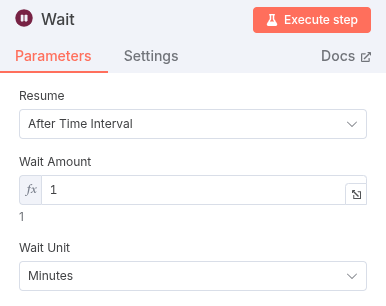
Step 4: Configure the Wait Node
In the Wait node’s settings, you’ll need to specify how long the workflow should pause. A good starting point for the Google Sheets API is a minute, but you can experiment with shorter or longer delays based on your specific needs. Set the Wait Amount to 1 and the Unit to Minutes.
Step 5: Connect the Wait Node Back to the Google Sheets Node
Now, connect the output of the Wait node back to the input of the Google Sheets node that originally failed. This creates a loop:
- The workflow attempts to update the sheet.
- If it fails with a rate limit error, it gets sent to the Wait node.
- The workflow pauses for one minute.
- After the wait, the data is sent back to the Google Sheets node, and the update is retried.
This “self-healing” loop continues until all items are processed successfully.
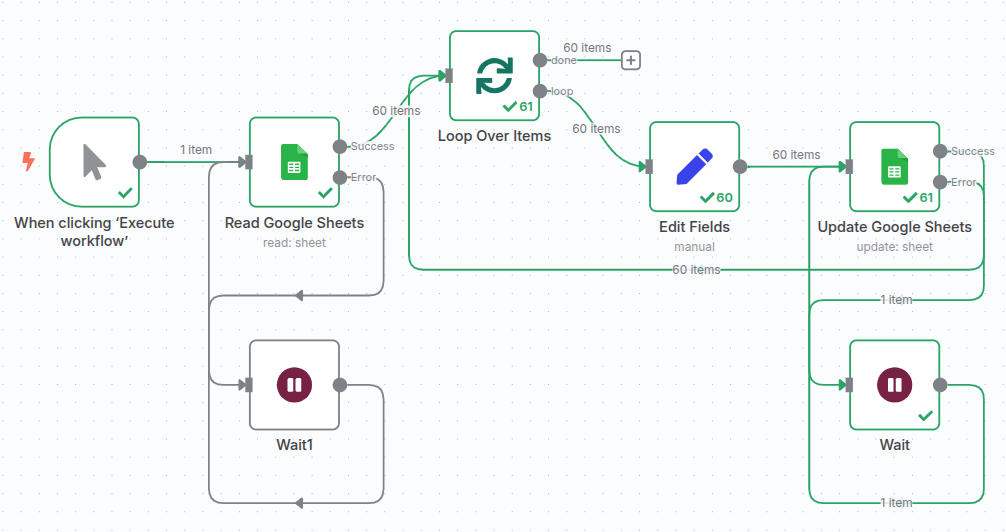
The Final Workflow
After implementing this change, your final workflow should look something like this:
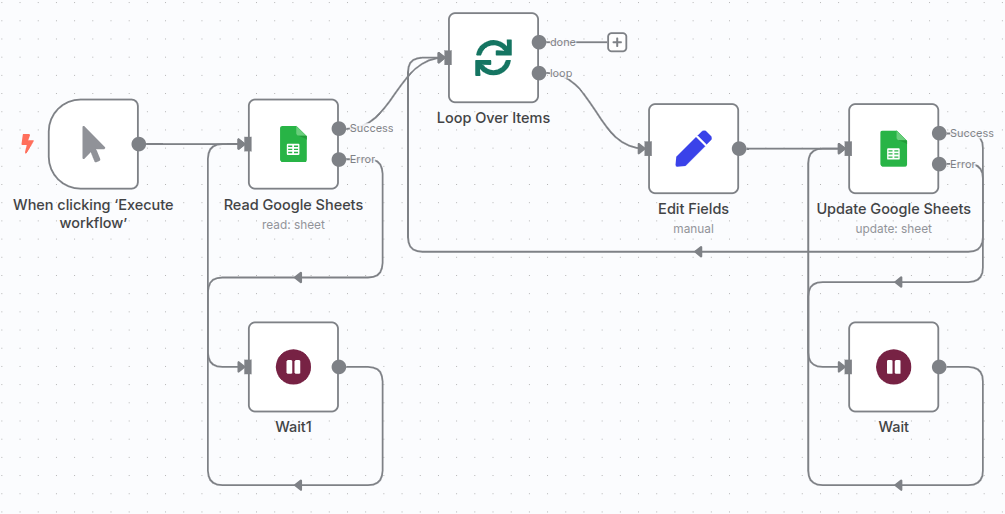
With this setup, the workflow will no longer fail outright. Instead, it will gracefully handle the rate limit, wait for a brief period, and then continue processing your data. If you check the execution log, you’ll see the Wait node executed only once when the rate limit was hit, proving that the delay strategy works exactly as intended.
The Google Sheet for this tip is available here as well as the n8n template. Also you can download this template in JSON format here.