
As you start building more complex and dynamic automations, you’ll inevitably run into a common challenge: managing multiple workflow executions. If you’ve been following the tips in my previous posts, you know how powerful it can be to use Google Sheets as a control panel for your workflows. You have a central sheet with many rows, and your workflow needs to process each row, one by one.
This approach is incredibly flexible, but it introduces a new problem. To keep your automation responsive, you’ve likely set up a Scheduled Trigger to check for new data every few minutes. But what happens if one execution takes longer than expected? The next scheduled execution will start while the first is still running, leading to concurrent executions that can cause a real mess. They’ll both try to process the same rows, potentially leading to errors, duplicate work, or lost data.
Let’s break down this common scenario and the simple, elegant fix.
The Workflow Setup: A Quick Recap
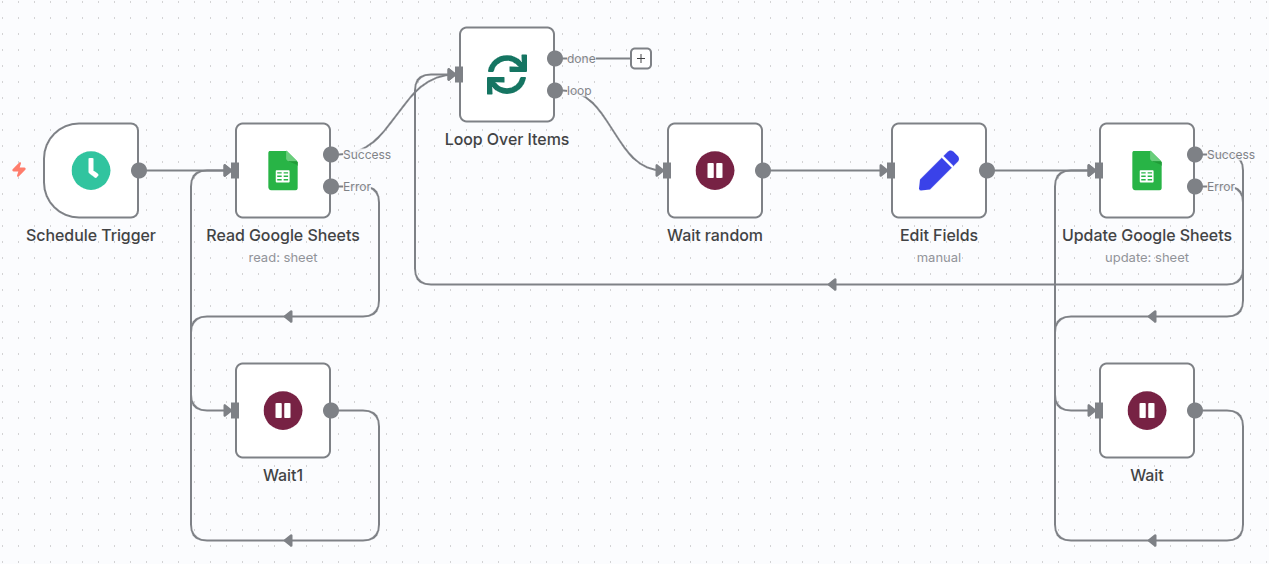
Imagine your workflow is designed to manage a large, dynamic list of tasks in a Google Sheet. It’s set up to do the following:
- A Schedule Trigger node runs the workflow every 5 minutes.
- A Google Sheets node reads a list of rows that need to be processed.
- The workflow then uses a Loop to process each row individually.
- After processing each row, it updates the Google Sheet with the new status.
This design is great because it ensures that even if an execution fails halfway through, the processed rows are already marked as complete. The next execution will simply pick up where the last one left off.
The Pitfall: When Workflows Collide
The issue arises when a single execution takes longer than the scheduled interval. For instance, if one workflow execution processes 50 rows, and each row takes a few seconds to handle, the total runtime could be over 5 minutes.
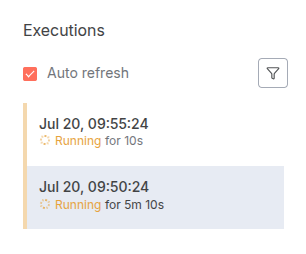
In this situation, the schedule trigger will fire again at the 5-minute mark, launching a new, completely separate execution of the same workflow. Both executions are now running simultaneously, which is exactly what we want to avoid. You might see a duplicate of the same job in your n8n Executions list, both doing the same work.
The Solution: A Simple Timeout Setting
The key to solving this problem lies in a powerful, often overlooked feature of n8n workflows: the Workflow Timeout. This setting defines the maximum amount of time a workflow is allowed to run before it is automatically stopped.
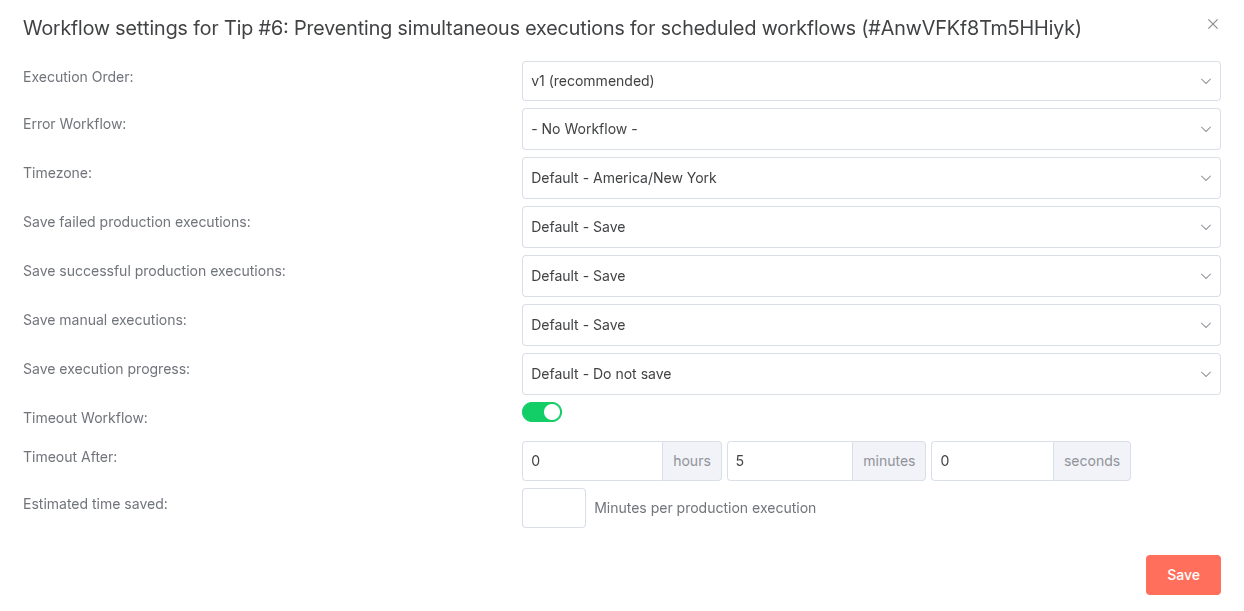
The trick is to simply set the workflow timeout to the exact same value as your scheduling interval.
For our example, since the schedule trigger is set to 5 minutes, you would set the workflow timeout to 5 minutes as well. This creates a perfect sync. If a workflow runs for the entire 5-minute duration, n8n will kill it. With this setting, if an execution is still running when the next schedule is due, n8n’s scheduler will not launch a new one until the active execution completes or hits its timeout.
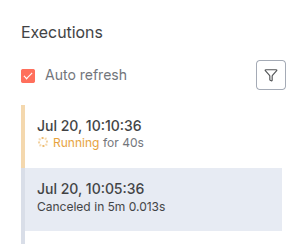
This simple change acts as a guardrail, ensuring that only one instance of your workflow is ever active at any given time.
The Result: Smooth, Sequential Processing
Once you’ve made this change, your workflow will behave exactly as you intended. Let’s look at the result:
- The schedule trigger fires at 10:00 AM.
- The workflow starts and processes rows for 3 minutes.
- The workflow completes at 10:03 AM.
- At 10:05 AM, the schedule trigger fires again. A new execution starts, picking up the next set of rows.
Even in a case where the first execution takes longer, the next execution will only start after the first one has finished. This ensures that your processing is always sequential and reliable, preventing any overlap, data conflicts, or redundant work.
This powerful but simple technique is an essential building block for creating robust, production-ready n8n automations. You can find the template for the described approach here. Or you can download raw template here.