
This post will walk you through a practical, no-code project: building a fully functional REST API with n8n and Google Sheets as a database. Instead of creating a separate ID column, we’ll use the unique row number to identify our data. We’ll cover the fundamental CRUD operations to create, read, update, and delete data.
Part 1: Setting the Stage
Before we start building, let’s get our environment ready. You’ll need a running n8n instance (either the cloud version or a self-hosted one) and a Google Account with access to Google Sheets.
Google Sheet Structure
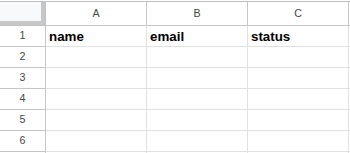
Our Google Sheet will serve as our database. To make our API functional, we need to structure it correctly. Open a new Google Sheet and create a header row with the following column names: name, email, and status.
The row number is our unique identifier. We will use it in our API calls to reference a specific record, which removes the need to manually manage an id column.
Workflow Setup
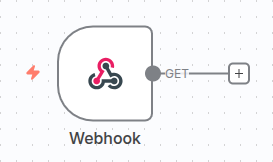
Log in to your n8n instance and create a new, empty workflow. The first node we’ll add is our entry point—a Webhook that will listen for incoming requests.
Part 2: The Core API Endpoints
We’ll be working with a local instance of the n8n community edition to build the endpoints for each of our CRUD operations. For this guide, we’ll assume our API’s base URL is http://localhost:5678/webhook/items.
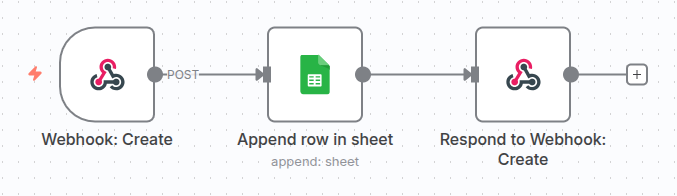
Create: The POST Endpoint
Our POST endpoint will allow us to create a new row in our spreadsheet. This is a common method for submitting new data.
- Add a Webhook node and set its HTTP Method to
POST. - Connect the Webhook to a Google Sheets node.
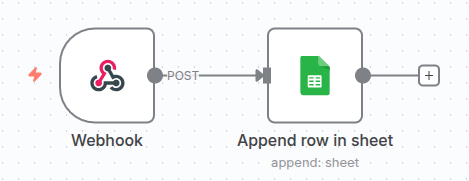
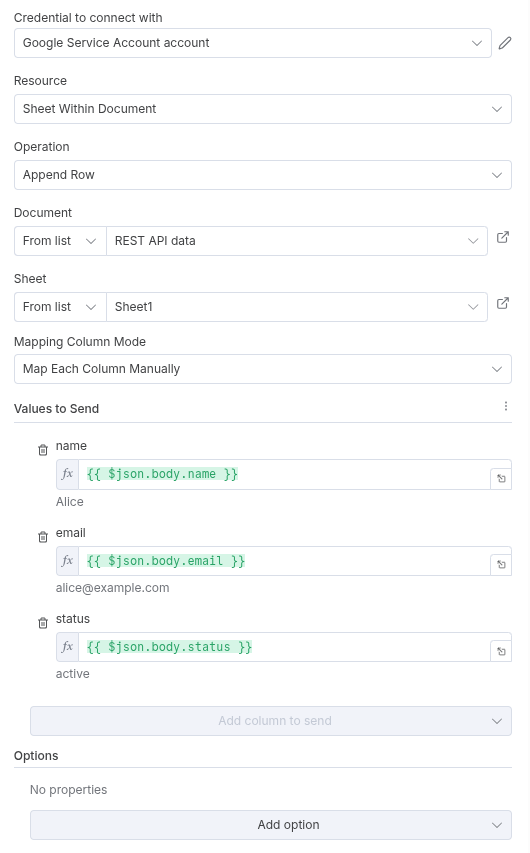
- Configure the Google Sheets node:
- Operation: Select
Append Row. - Authentication: Connect your Google Account credentials.
- Spreadsheet: Choose the Google Sheet from the list.
- Sheet Name: Choose the sheet name from the list.
- Data to Append: Use expressions to map the incoming data from the webhook to the correct columns. For example, for the
namecolumn, use an expression like{{ $json.body.name }}.
- Finally, add a Respond to Webhook node. This is a best practice to send a success message back to the user who called the API. You can send a simple JSON object like
{"status": "success", "message": "Record created."}.
Read: The GET Endpoints
We’ll build two different GET endpoints to read data. The first will get all records, and the second will get a specific record by its row number.
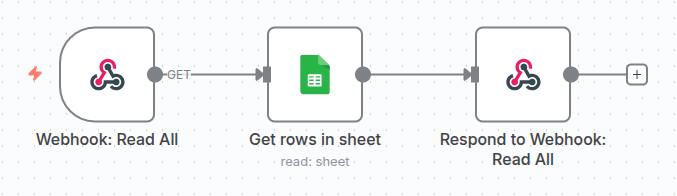
- Get All Records:
- Add a new Webhook node and set its HTTP Method to
GET. - In the Path field, add a static path like
items/all. - Connect it to a Google Sheets node.
- Configure the Google Sheets node with the Operation set to
Get Row(s). - Add a Respond to Webhook node to return the data.
- Get a Single Record:
- Add another Webhook node. This one will use a path parameter.
- Set its HTTP Method to
GET. - In the Path field, add a static path like
items. This tells n8n to listen for a request with an ID in the URL, likehttp://localhost:5678/webhook/items?id=2.
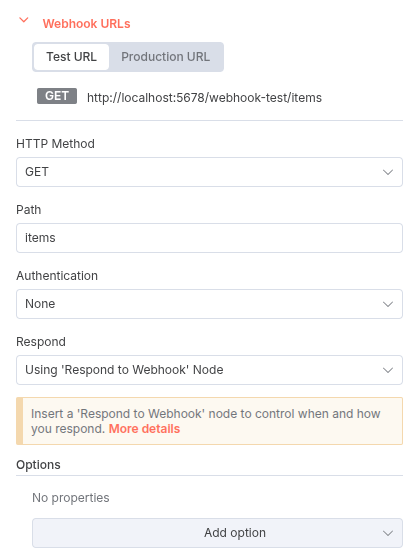
- Connect it to a Google Sheets node with the Operation set to
Get Row(s). - For the Row Number field, use an expression to pull the number from the URL path:
{{ $json.query.id }}. - Add a Respond to Webhook node to return the single record.

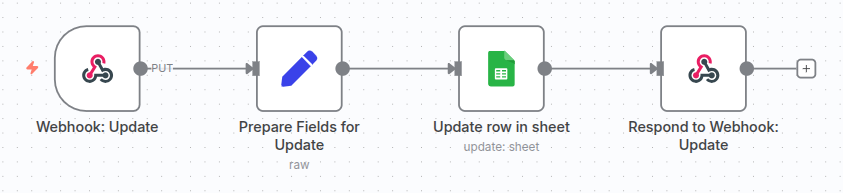
Update: The PUT Endpoint
To update an existing record, we’ll use a PUT request. This endpoint requires an intermediate step to structure the data correctly before sending it to Google Sheets.
- Add a Webhook node and set its HTTP Method to
PUT. - Set the Path field to
items. The row number will be passed as a query parameter,id. - Connect the Webhook to a Set node.
- Configure the Set node to create a new JSON object. This step combines the
idfrom the query parameter with the data from the request body. In the JSON field, use the following expression:
{
  "row_number": {{ $json.query.id }}
  {{ $if($json.body.keys().length > 0, ', ' + $json.body.toJsonString().replace('{', '').replace('}', ''), '') }}
}
- Connect the Set node to a Google Sheets node.
- Configure the Google Sheets node with the Operation set to
Update Row. - Under Mapping Column Mode, select
Map Automatically. - Under Column to match on, select
row_number. This will automatically match the row to update using therow_numberfield from the previous node. - Add a Respond to Webhook node to confirm the update.
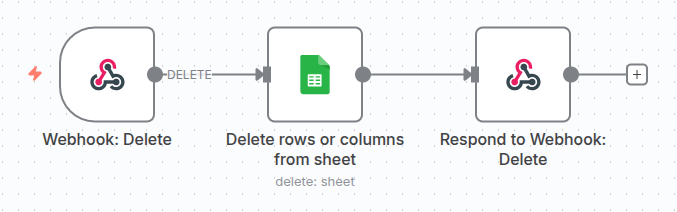
Delete: The DELETE Endpoint
Finally, our DELETE endpoint will handle removing a record.
- Add a Webhook node and set its HTTP Method to
DELETE. - Set the Path field to
items. - Connect the Webhook to a Google Sheets node.
- Set the Operation to
Delete Rows or Columns. - Use an expression like
{{ $json.query.id }}to specify the row to be deleted. - Add a Respond to Webhook node to send a success message.
Part 3: Testing Your API
With your workflow built, it’s time to test! For this, you can use a tool like Postman, Insomnia, or a simple command-line utility like curl.
Here are some example curl commands:
- Create a new record (POST):
curl -X POST http://localhost:5678/webhook/items -H "Content-Type: application/json" -d '{"name": "Alice", "email": "alice@example.com", "status": "active"}'
- Get all records (GET):
curl -X GET http://localhost:5678/webhook/items/all
- Get a single record (GET):
curl -X GET http://localhost:5678/webhook/items?id=2
- Update a record (PUT):
curl -X PUT http://localhost:5678/webhook/items?id=2 -H "Content-Type: application/json" -d '{"status": "inactive"}'
- Delete a record (DELETE):
curl -X DELETE http://localhost:5678/webhook/items?id=2
Conclusion
You’ve just built a fully functional REST API using n8n and Google Sheets, all without writing a single line of code! This project demonstrates how powerful no-code tools can be for rapid prototyping and creating simple backends. From here, you can continue to build on this foundation. Consider adding more complex data validation, implementing basic API key authentication, or even connecting to other services to automate your data flows even further.
Thank you for following this tutorial! You can access the Google Sheet used in this tutorial here and n8n template here. Alternatively you can directly download JSON file of the template.