
One of the best ways to level up your n8n skills is to tackle classic programming problems, and what’s more classic than the Fibonacci sequence? This simple number sequence is a fantastic way to stretch your mind and get creative with n8n’s control flow nodes.
While a simple Code node might solve this in one line of JavaScript, where’s the fun in that? We’re here to build a “low-code” solution that truly puts n8n’s core logic to the test. Let’s create an iterative Fibonacci generator using a loop made from Switch and Set nodes.
The Idea Behind the Iterative Approach
First, a quick refresher. The Fibonacci sequence starts with 0 and 1, and each subsequent number is the sum of the two preceding ones. Iteration is simply the process of building the sequence step-by-step, starting from the beginning and adding new numbers one by one until we’ve reached our desired length.
Our goal is to create a workflow that mimics this process: starting with the first two numbers (0 and 1) and then adding the next number to the list, over and over, until we have a sequence of the desired length.
Building the n8n Workflow
1. The Starting Point: Input
We’ll begin with a Start node and connect it to a Set node. We’ll call this node “Input.” This is where we define the core variables for our project.
Inside the “Input” node, create two fields:
fib: An empty array ([]). This is where we will store our generated Fibonacci numbers.n: A number representing the length of the sequence you want to generate (e.g.,10).
![A screenshot showing the n8n Set node named “Input,” with two key-value pairs. The first key is “fib” with an empty array value [], and the second key is “n” with a number value, such as 10.](/post/2025/09/n8n-iterative-fibonacci-sequence/1.png)
2. The Core Logic: The Switch Node Loop
The heart of our workflow is a Switch node that creates a loop. This node will evaluate the value of n at each step and route the workflow accordingly. The magic happens when we connect the output of our subsequent Set nodes back to this Switch node, creating a continuous loop.
Here are the rules you’ll need to configure in the Switch node:
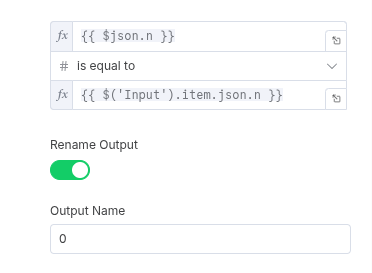
- Rule 1: If
nis equal to the initialnvalue.- This is our first pass through the loop. We don’t want to add anything to the fib array yet, as our first two numbers are special cases. We’ll simply route the workflow to the next step.
- Condition:
nis equal to your initialnvalue.

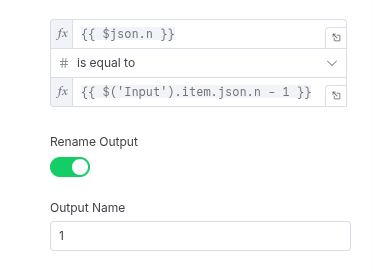
- Rule 2: If
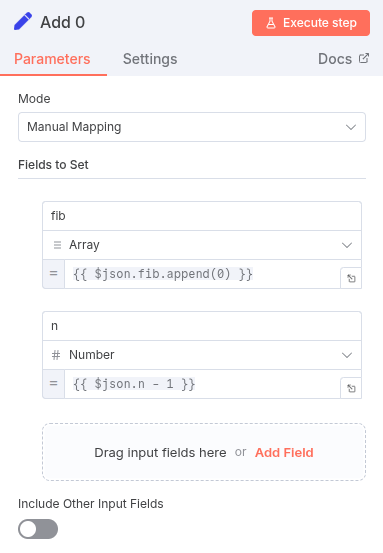
nis equal toinitial_n - 1.- Now we’re ready to start building the sequence. We’ll connect this route to a
Setnode that appends the first number to our array. Setnode: Append0to thefibarray.
- Now we’re ready to start building the sequence. We’ll connect this route to a
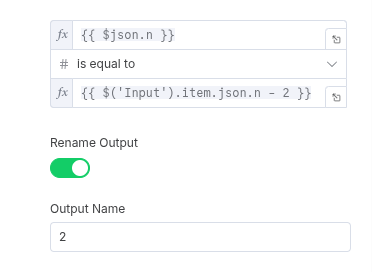
- Rule 3: If
nis equal toinitial_n - 2.- This is where we add the second number to our array.
Setnode: Append1to thefibarray.

- Rule 4: The General Case.
- This rule handles all other values of
n(i.e.,n < initial_n - 2). This is the meat of the iterative process. - The
Setnode for this path will perform two key actions:- Retrieve the last two numbers from the
fibarray. - Calculate their sum.
- Append the sum to the
fibarray.
- Retrieve the last two numbers from the
- This rule handles all other values of

3. The Set Node Logic
For each of the Set nodes connected to our Switch node rules, you also need to decrement the value of n by 1 before routing the output back to the Switch node. This is what ensures our loop eventually terminates.
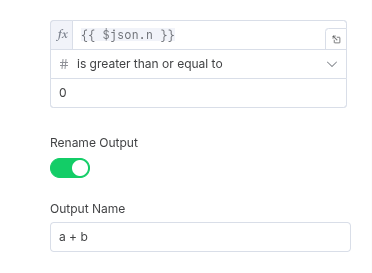
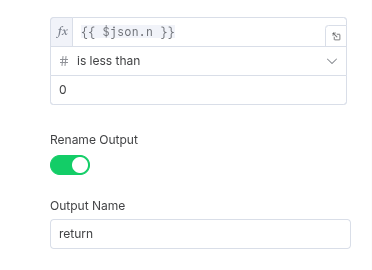
4. The Exit Condition
The loop will continue until n becomes less than 0. We’ll create a final Switch node rule to handle this exit condition. This is our signal to end the workflow.
Connect the output of this final rule to a node that simply returns the complete fib array. This is our final result.
The Final Result
When you execute this workflow, it will iterate through the Switch node, building the fib array one number at a time until it has the desired length. This project is a great demonstration of how you can build powerful, custom logic in n8n using a combination of simple nodes. It shows that you don’t always need a single, complex code block to solve a problem—sometimes, a clever use of control flow is all you need.

![A screenshot of the n8n output panel. The panel displays the final result, showing the “fib” array with the first ten numbers of the Fibonacci sequence: [0, 1, 1, 2, 3, 5, 8, 13, 21, 34].](/post/2025/09/n8n-iterative-fibonacci-sequence/c.png)
You can download raw template for this workflow here.