Getting a screenshot of a website is a common task for many automations, from archiving web pages to generating social media previews. In this post, we’ll dive into how to use three popular screenshot and web scraping services—ScraperAPI, Scrapingdog, and ScreenshotOne—directly within your n8n workflows. We’ll compare their free and basic paid plans, show you how to set them up, and share some benchmark results.
Free and Basic Paid Plans Comparison
Each service offers a different entry point, which can be a key factor in choosing the right tool for your needs.
- ScraperAPI: A basic request for a screenshot costs 10 credits. ScraperAPI offers a 7-day free trial with 5,000 API credits. After the trial, you can opt for a paid plan starting at $49 per month for 100,000 credits. The free trial gives you full access to features like JS rendering and geotargeting.
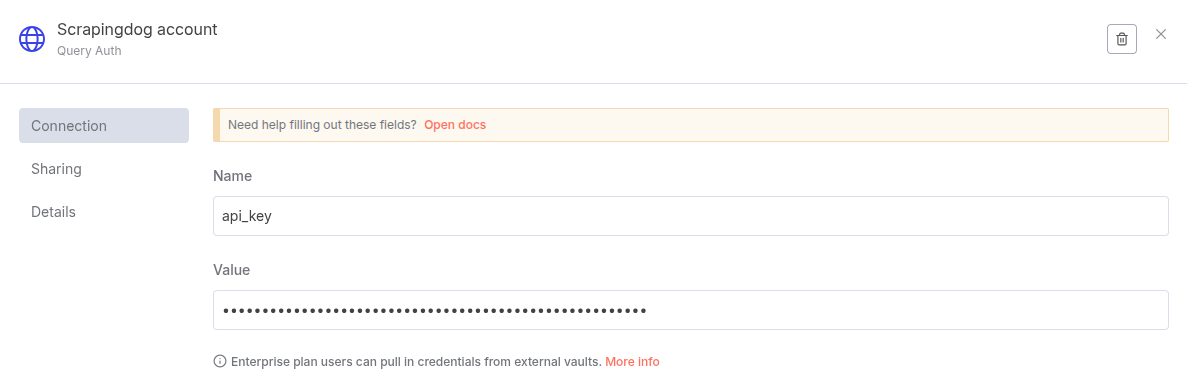
- Scrapingdog: A screenshot request costs 5 credits. It provides a free plan with 1,000 credits per month. The Lite plan starts at $40 per month and includes 200,000 credits.
- ScreenshotOne: This service has a free-forever plan that lets you take up to 100 screenshots per month. The Basic plan starts at $17 per month for 2,000 screenshots.
While ScraperAPI and Scrapingdog focus more on general web scraping with screenshot functionality, ScreenshotOne is a dedicated screenshot API, which can explain the differences in their plan structures.
Using the Services in n8n
1. ScraperAPI
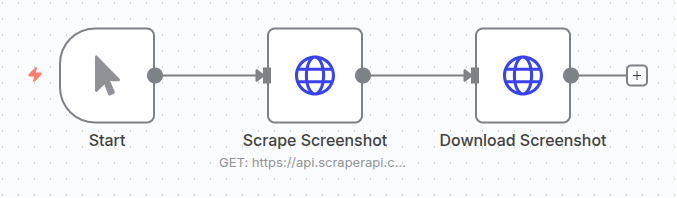
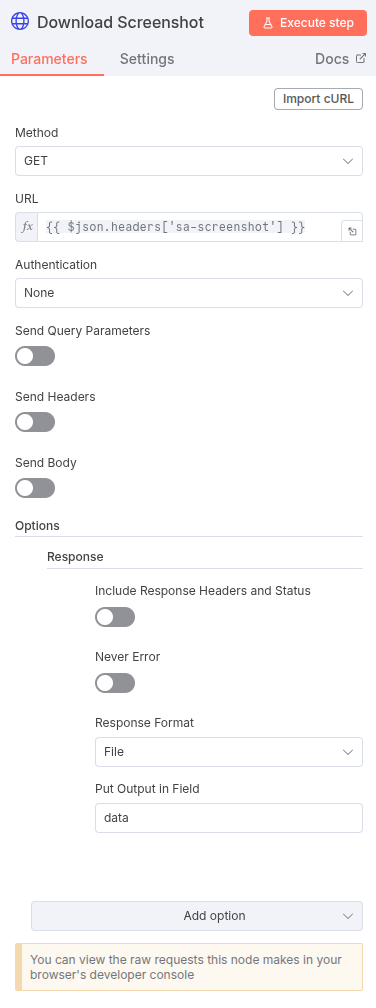
ScraperAPI offers a powerful and comprehensive API. To use it in n8n, you’ll need a two-step process to handle the screenshot.
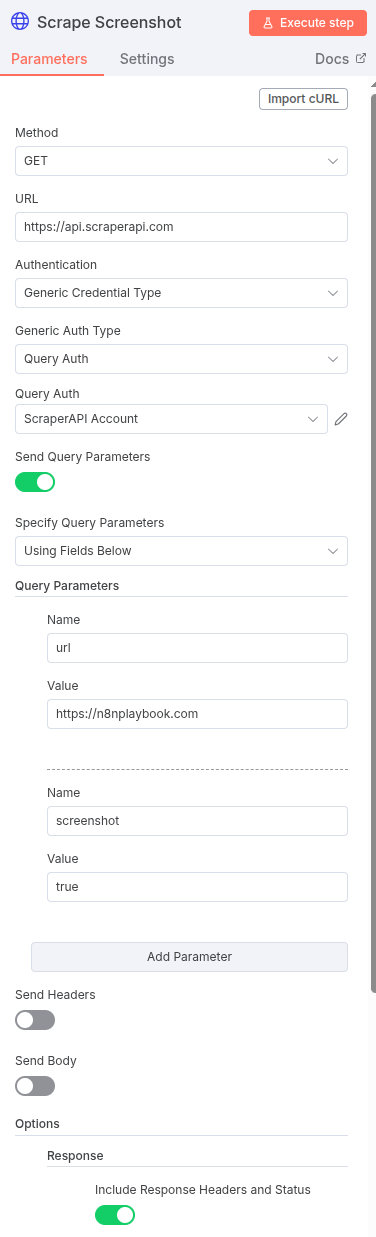
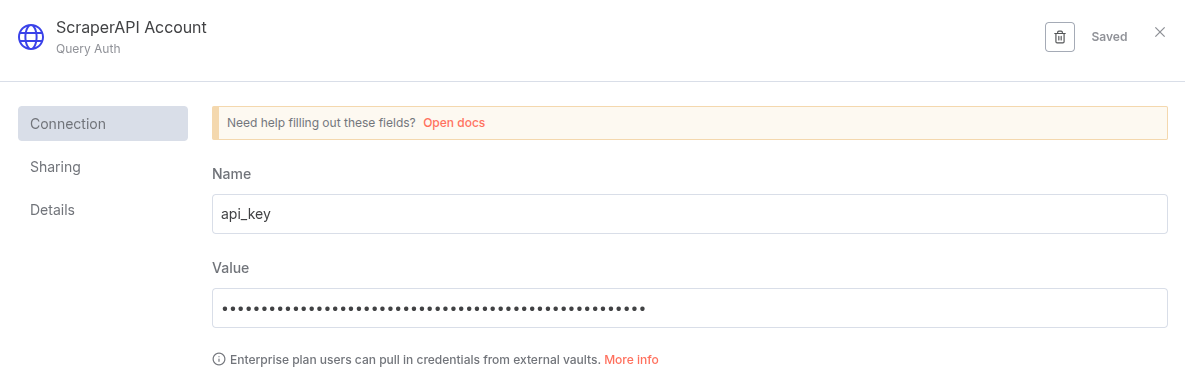
First, add an HTTP Request node to your workflow. Set the URL to the ScraperAPI endpoint and the target website you need to scrape as a query parameter, and add your API key as a query authentication credential to the HTTP Request node. The API response will contain the screenshot URL in a header.
Next, add another HTTP Request node to download the screenshot itself using the URL returned from the first request’s headers. This two-step process ensures you get the raw image data.
2. Scrapingdog
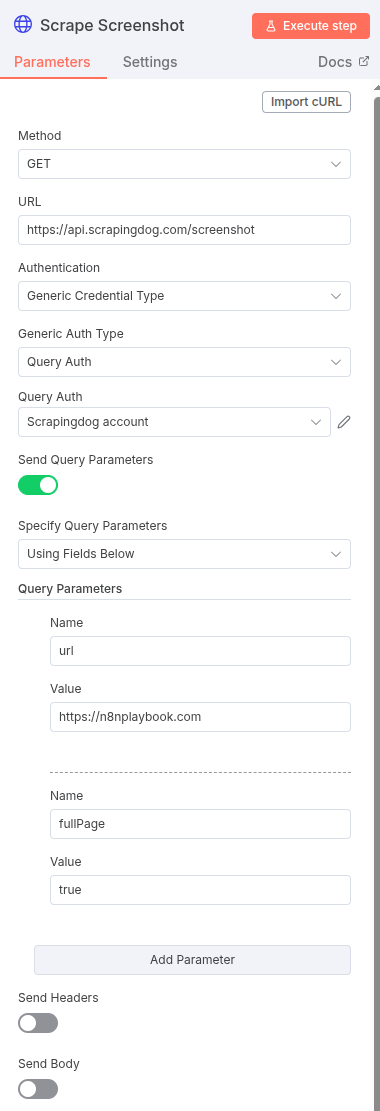
Scrapingdog provides a straightforward approach with a single request.
Add an HTTP Request node and set the URL to the Scrapingdog API endpoint. You’ll then need to specify the target website URL as a parameter for the screenshot, and add your API key as a query authentication credential to the HTTP Request node. The API returns the screenshot directly in the response body.
In our testing, we noticed some issues with page layouts on certain sites, which might be solvable by adjusting parameters.
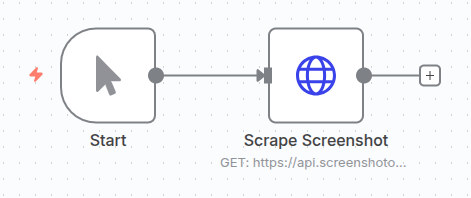
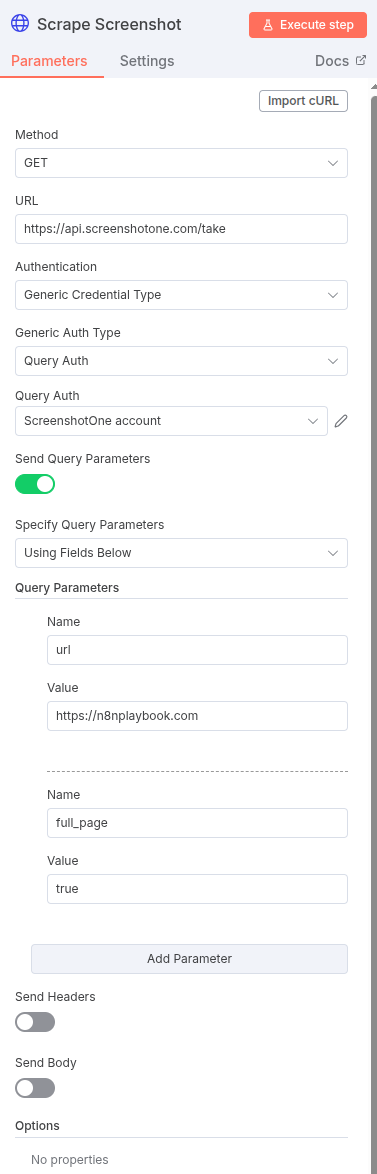
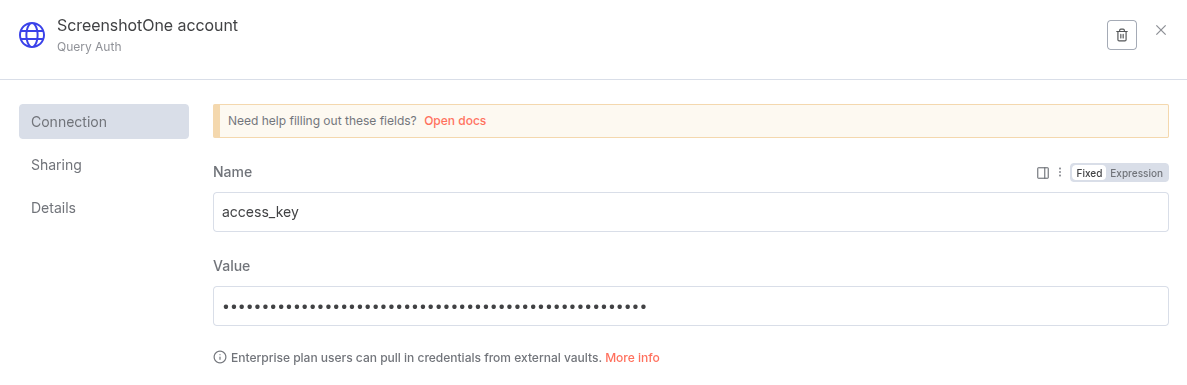
3. ScreenshotOne
ScreenshotOne is a highly specialized service for screenshots.
Add an HTTP Request node and set the URL to the ScreenshotOne API endpoint. Authenticate with your API key and specify the target URL and any other options. The API will return the screenshot directly, often with better performance and quality for image-specific tasks.
Benchmark Results
We conducted a simple benchmark test using basic settings and measured the response time to get a screenshot of n8nplaybook.com.
- ScreenshotOne: 7 seconds
- Scrapingdog: 14 seconds
- ScraperAPI: 54 seconds
These results show a clear speed advantage for ScreenshotOne in this specific scenario, likely due to its dedicated focus on screenshots. While ScraperAPI was the slowest in our test, its speed may vary depending on the complexity of the page and the specific features being used. Scrapingdog offered a balanced performance, and its page layout issues could likely be resolved with further parameter tuning.
Conclusion
Choosing the right service depends on your specific needs. If you’re looking for a service with a wide range of features and robust scraping capabilities in addition to screenshots, ScraperAPI and Scrapingdog are excellent choices. If your primary goal is to get fast, high-quality screenshots for your workflows, ScreenshotOne is the clear winner in terms of pure performance and focus.
You can download n8n template from this article here